
👷 Deploy with Hardhat
Hardhat is a development environment for EVM-based smart contracts. It enables compilation, testing, and deployment on local or live networks.
1. Prerequisites
Before starting, ensure you have the following tools installed:
- Node.js and NPM: Download and install from Node.js official website.
- Hardhat: Install Hardhat using the following Hardhat Installation Guide.
To get started, you'll also need:
- Corn Network RPC URLs: You can use one of Corn's public RPCs for Maizenet or testnet, although obtaining a private RPC with one of Corn's RPC Providers is highly recommended to ensure the highest reliability and performance.
- Private Key: The private key of the account you'll be using to deploy the contract, this account must have BTCN on the network you are deploying to.
Public RPCs are rate limited and not suitable for production environments. For applications with high traffic, it is recommended to run a node locally or use a private RPC provider.
2. Set Up a New Hardhat Project
-
Create a new directory and navigate into it:
mkdir hardhat-corn-example
cd hardhat-corn-example -
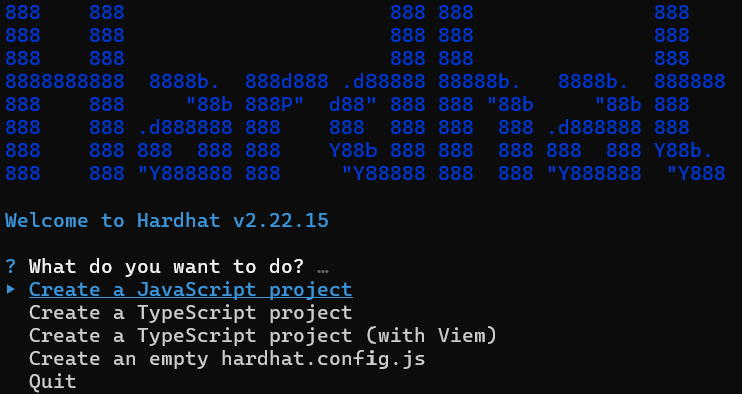
Initialize the Hardhat project:
npx hardhat initPick the type of project you want to create (see the options below), then follow the prompts to install dependencies.
Once done, your project directory will have a structure similar to this:
hardhat-corn-example/
├── contracts/
│   └── Lock.sol
├── scripts/
│   └── deploy.js
├── test/
├── hardhat.config.js
└── package.json
3. Install Dependencies
To deploy to Corn, install dotenv for environment variable management and @nomiclabs/hardhat-ethers for Ethereum development:
npm install dotenv @nomicfoundation/hardhat-ethers ethers@^6.1.0
In your project root, create a .env file to store sensitive information:
touch .env
4. Configure Hardhat for Corn Network
Update the hardhat.config.js file to add Corn's Maizenet and testnet RPC URLs. Here's an example configuration:
require("@nomicfoundation/hardhat-ethers");
require("dotenv").config();

module.exports = {
  solidity: "0.8.17",
  networks: {
    cornMaizenet: {
      url: process.env.CORN_MAIZENET_RPC_URL,
      accounts: [process.env.DEPLOYER_PRIVATE_KEY],
    },
    cornTestnet: {
      url: process.env.CORN_TESTNET_RPC_URL,
      accounts: [process.env.DEPLOYER_PRIVATE_KEY],
    },
  },
};
In your .env file, store the RPC URLs and private key:
CORN_MAIZENET_RPC_URL=https://your-corn-maizenet-rpc-url.com
CORN_TESTNET_RPC_URL=https://your-corn-testnet-rpc-url.com
DEPLOYER_PRIVATE_KEY=your-private-key
Keep your .env file private and avoid committing sensitive data to version control.
5. Write and Compile a Smart Contract
Navigate to the contracts directory and create a simple contract file.
contracts/HelloCorn.sol:
// SPDX-License-Identifier: MIT
pragma solidity ^0.8.17;

contract HelloCorn {
    string public greeting = "Welcome to Corn!";

    function setGreeting(string calldata _greeting) external {
        greeting = _greeting;
    }
}
Compile the contract:
npx hardhat compile
6. Write a Deployment Script
In the scripts directory, create a deployment script that will handle the contract deployment.
scripts/deploy.js:
async function main() {
    const HelloCorn = await ethers.getContractFactory("HelloCorn");
    const helloCorn = await HelloCorn.deploy();

    await helloCorn.waitForDeployment();
    console.log("HelloCorn deployed to:", await helloCorn.getAddress());
  }

  main().catch((error) => {
    console.error(error);
    process.exitCode = 1;
});
7. Deploy to Corn Network
To deploy, use the following commands, specifying the network:
Deploy to Corn Testnet
npx hardhat run scripts/deploy.js --network cornTestnet
Deploy to Corn Maizenet
npx hardhat run scripts/deploy.js --network cornMaizenet
After deployment, Hardhat will display the contract address on the specified network.
8. Notes on Hardhat Development
-
Gas Optimization: Hardhat gas usage and estimates are denominated on ETH regardless of the network. Bare in mind that the although the estimated values are accurate, the gas paid on Corn is denominated in BTCN.
-
Environment Variables: Manage sensitive information securely by using environment variables. Consider using
.envfiles and loading them with libraries likedotenv. -
Testing: Hardhat provides excellent testing tools through
npx hardhat test. Simulate your contract interactions locally to ensure reliable functionality before deploying to Corn.
9. Contract Verification
After deploying your smart contract, you can verify it on Cornscan using the hardhat-verify plugin. This allows other users to view and interact with your contract's source code.
Install the Verification Plugin
npm install --save-dev @nomiclabs/hardhat-verify
Update Hardhat Configuration
Add the verification settings to your hardhat.config.js:
require("@nomicfoundation/hardhat-ethers");
require("@nomiclabs/hardhat-verify");
require("dotenv").config();

module.exports = {
  solidity: "0.8.17",
  networks: {
    cornMaizenet: {
      url: process.env.CORN_MAIZENET_RPC_URL,
      accounts: [process.env.DEPLOYER_PRIVATE_KEY],
    },
    // ... other networks
  },
  etherscan: {
    apiKey: {
      cornMaizenet: 'corn', // apiKey is not required, just set a placeholder
    },
    customChains: [
      {
        network: 'cornMaizenet',
        chainId: 21000000,
        urls: {
          apiURL: 'https://api.routescan.io/v2/network/mainnet/evm/21000000/etherscan',
          browserURL: 'https://cornscan.io'
        }
      }
    ]
  }
};
Verify Your Contract
After deploying your contract, you can verify it using the following command:
npx hardhat verify --network cornMaizenet CONTRACT_ADDRESS [CONSTRUCTOR_ARGS]
For example:
- For contracts without constructor arguments:
npx hardhat verify --network cornMaizenet 0x123...abc - For contracts with constructor arguments:
npx hardhat verify --network cornMaizenet 0x123...abc "arg1" "arg2"
Once verified, you'll be able to view your contract's source code and interact with it directly on Cornscan.
Learn more about Cornscan verification with Hardhat here.